 Add Row
  Add
Add 

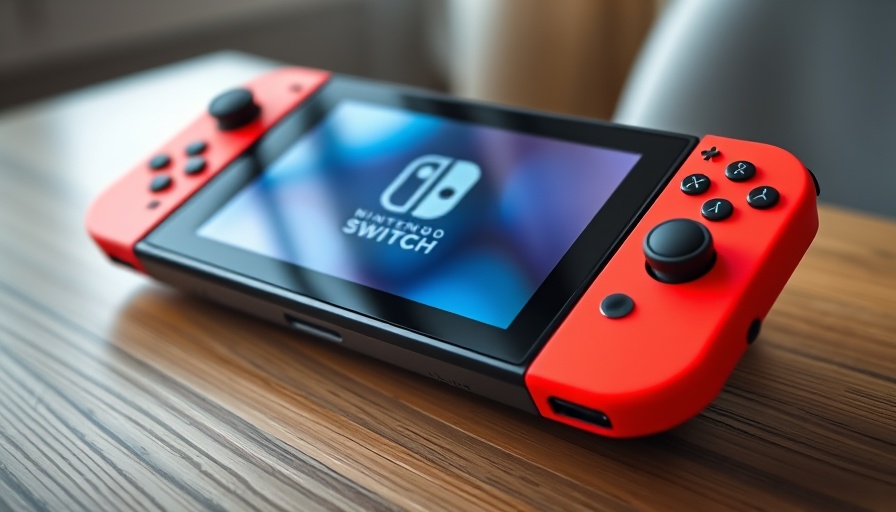
Getting Started with Your Nintendo Switch 2: A Step-by-Step Guide
Congratulations on securing your Nintendo Switch 2! As a digital nomad, efficiency is paramount, and starting off on the right foot with your new gaming console can enhance your productivity. Let’s dive into a detailed setup guide that will ensure your console is ready for action and seamlessly integrated into your lifestyle.
Unboxing and Understanding Your Switch 2
Opening the box is always exciting! Carefully remove your Nintendo Switch 2 along with the Joy-Con controllers. The design makes it easy to attach the controllers: the one with red highlights connects on the right side, while the blue one goes on the left. Ensure they’re securely in place before proceeding, as this simple step can save you time later.
Powering On and Initial Setup
Once your controllers are in place, connect the Switch 2 to power using the included charging brick and cable. Power it on, and follow the on-screen instructions to select your language and region. This ensures that your console is properly set up for your area, optimizing internet connectivity and downloads.
Crucial First Steps: Internet Connection and Updates
Connecting your device to the internet is a crucial step during the setup. While you can skip the day-one system update, doing so is highly recommended as it unlocks essential features, including backward compatibility. If you happen to miss this step, don't worry; you can return to it later in the Settings section. A stable internet connection will also help you download any initial games you plan to play.
Transferring Data from Your Switch 1
If you’ve upgraded from the original Switch, transferring your data is a must. However, you can do this only during the setup phase. Follow the on-screen prompts carefully to transfer your games and save data, avoiding the hassle of resetting your new device later on. If you skip this step, you'll need to copy over each game manually, which can be quite time-consuming.
Setting Up Parental Controls with Your New Console
Parental controls are not just for kids! Even as a solo gamer, managing screen time and limiting exposure to certain types of content can be beneficial. Use the Nintendo Switch Parental Controls app available on mobile devices to customize usage settings. This way, you can maintain a balanced gaming experience.
Exploring the Features: Virtual Game Cards
One of the exciting developments with the Switch 2 is its support for Virtual Game Cards. This new feature allows you to access games digitally, reducing the need for physical copies that can clutter your traveling gear. Ensure to explore this option as it can significantly enhance your gaming experience on-the-go.
Final Setup Tips: Customizing Your Experience
Now that the initial setup is complete, take a moment to customize your console. Personalizing game preferences and creating user profiles can streamline your gaming sessions and improve accessibility. This efficiency is key for digital nomads looking to maximize their limited time.
Transitioning Into Your Gaming Sessions
With everything set up, it's time to dive into gameplay! Embrace this opportunity to enjoy your Switch 2, whether you’re at home or traveling. The device is designed for portability and ease, enabling you to engage with your favorite games whenever and wherever you desire.
Call to Action: Embrace Your New Gaming Adventure
Your new Nintendo Switch 2 is more than just a console; it’s a gateway to new experiences and adventures. Take a moment to familiarize yourself with its features, customize your setup, and let the gaming begin! Invest the time in setting it up right, and you’ll reap the rewards in countless hours of fun.

Write A Comment